Using Amazon Ads to promote a product is a straightforward process. You just need to select a product to promote, set up the campaign, select the target, optimize the campaign, etc.
In this lesson, I’ll show you how I set up advertising campaigns to promote my products.
I need to tell you that having a good product is the most important part in the business. Whether you’re an Amazon or Facebook Ads master, the product has to be good enough. Otherwise, people won’t purchase your product, even if you spend lots of money on the ads.
Select a Product to Promote
Okay, the first thing to do is to select a product to promote.
First, I usually check to ensure that the products I’m considering have racked up at least 3 or 4 sales per month.
Then find out if there’s a special day for that niche.
For example, if I have an Engineer mug that sells really well on typical days, I will go to Google and search “Engineer Day” to see whether there is a “day” for this niche or not.
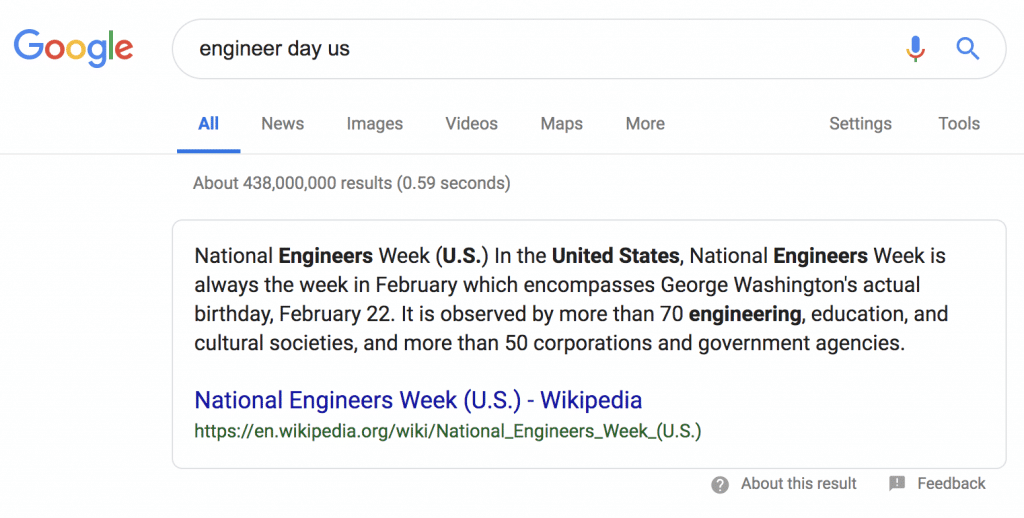
It’s February 22nd.
Almost every occupation has its own special day. Nurse’s Day, Teacher’s Day, Dentist’s Day, etc.
You can make money from them all.
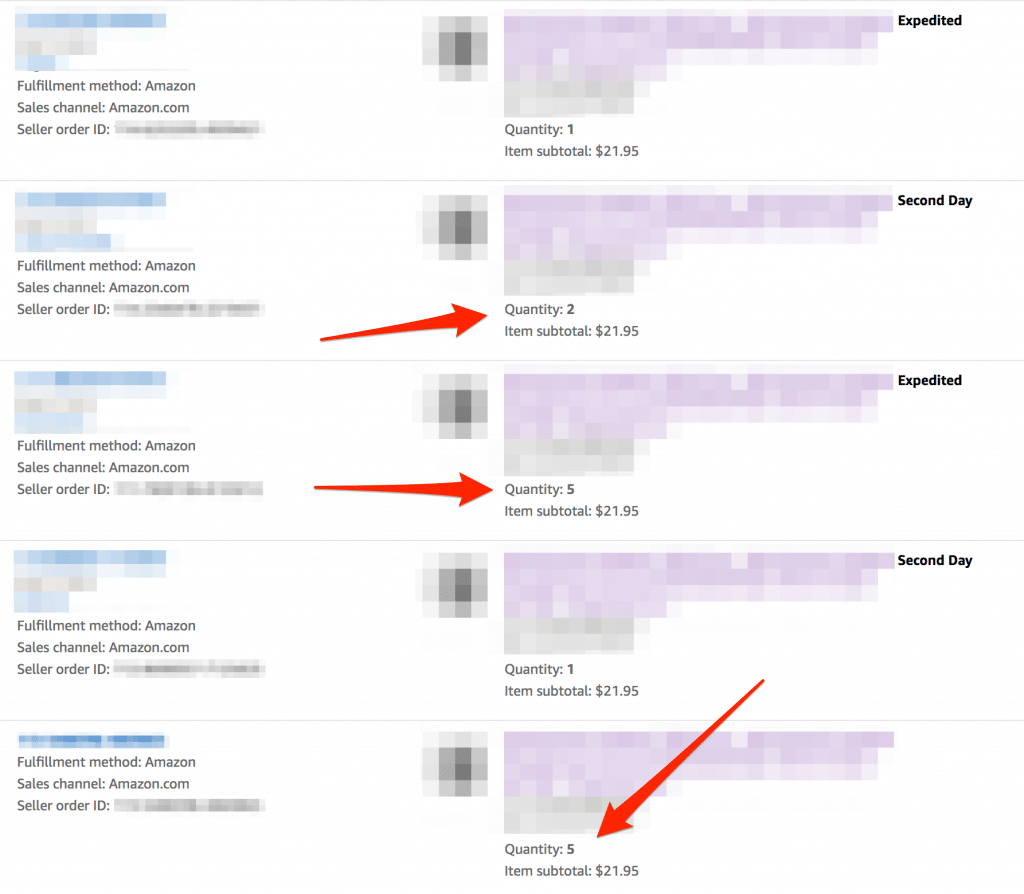
I’ve found that this kind of audience will purchase multiple units of the same product. They usually buy the product as a gift for their friends or colleagues.
So if you have some sales from some items, find out whether there is any special occasion for the people in that niche.
If you’re going to promote the products on more routine special days like Mother’s Day, Father’s Day, or Shopping Season (November to December), you can use the same method.
For example, if Mother’s Day is coming up within a month, I’ll go to the business report in my Amazon account and check whether or not I’ve sold any products related to mothers.
If you’re planning to promote products in Q4 (when it’s very easy to sell anything), you can select some of the products you’ve sold in the past to promote.
Just 3-4 sales from one product is enough to try promoting it ads.
Select products that have sold a few times in the past, and plan to sell them before those special events.
Send a Product to FBA.
The next thing to do is to send the selected product to the Amazon warehouse.
This is necessary because Amazon Ads work great with products that can be shipped within a few days and carry the Amazon Prime badge.
When I was starting out, I promoted some products without sending them to the Amazon warehouse. It worked, but not very well. According to my stats, FBA products work much, much better.
They have an “unfair advantage”, remember?
Check out the search results below and you’ll understand it all more clearly.
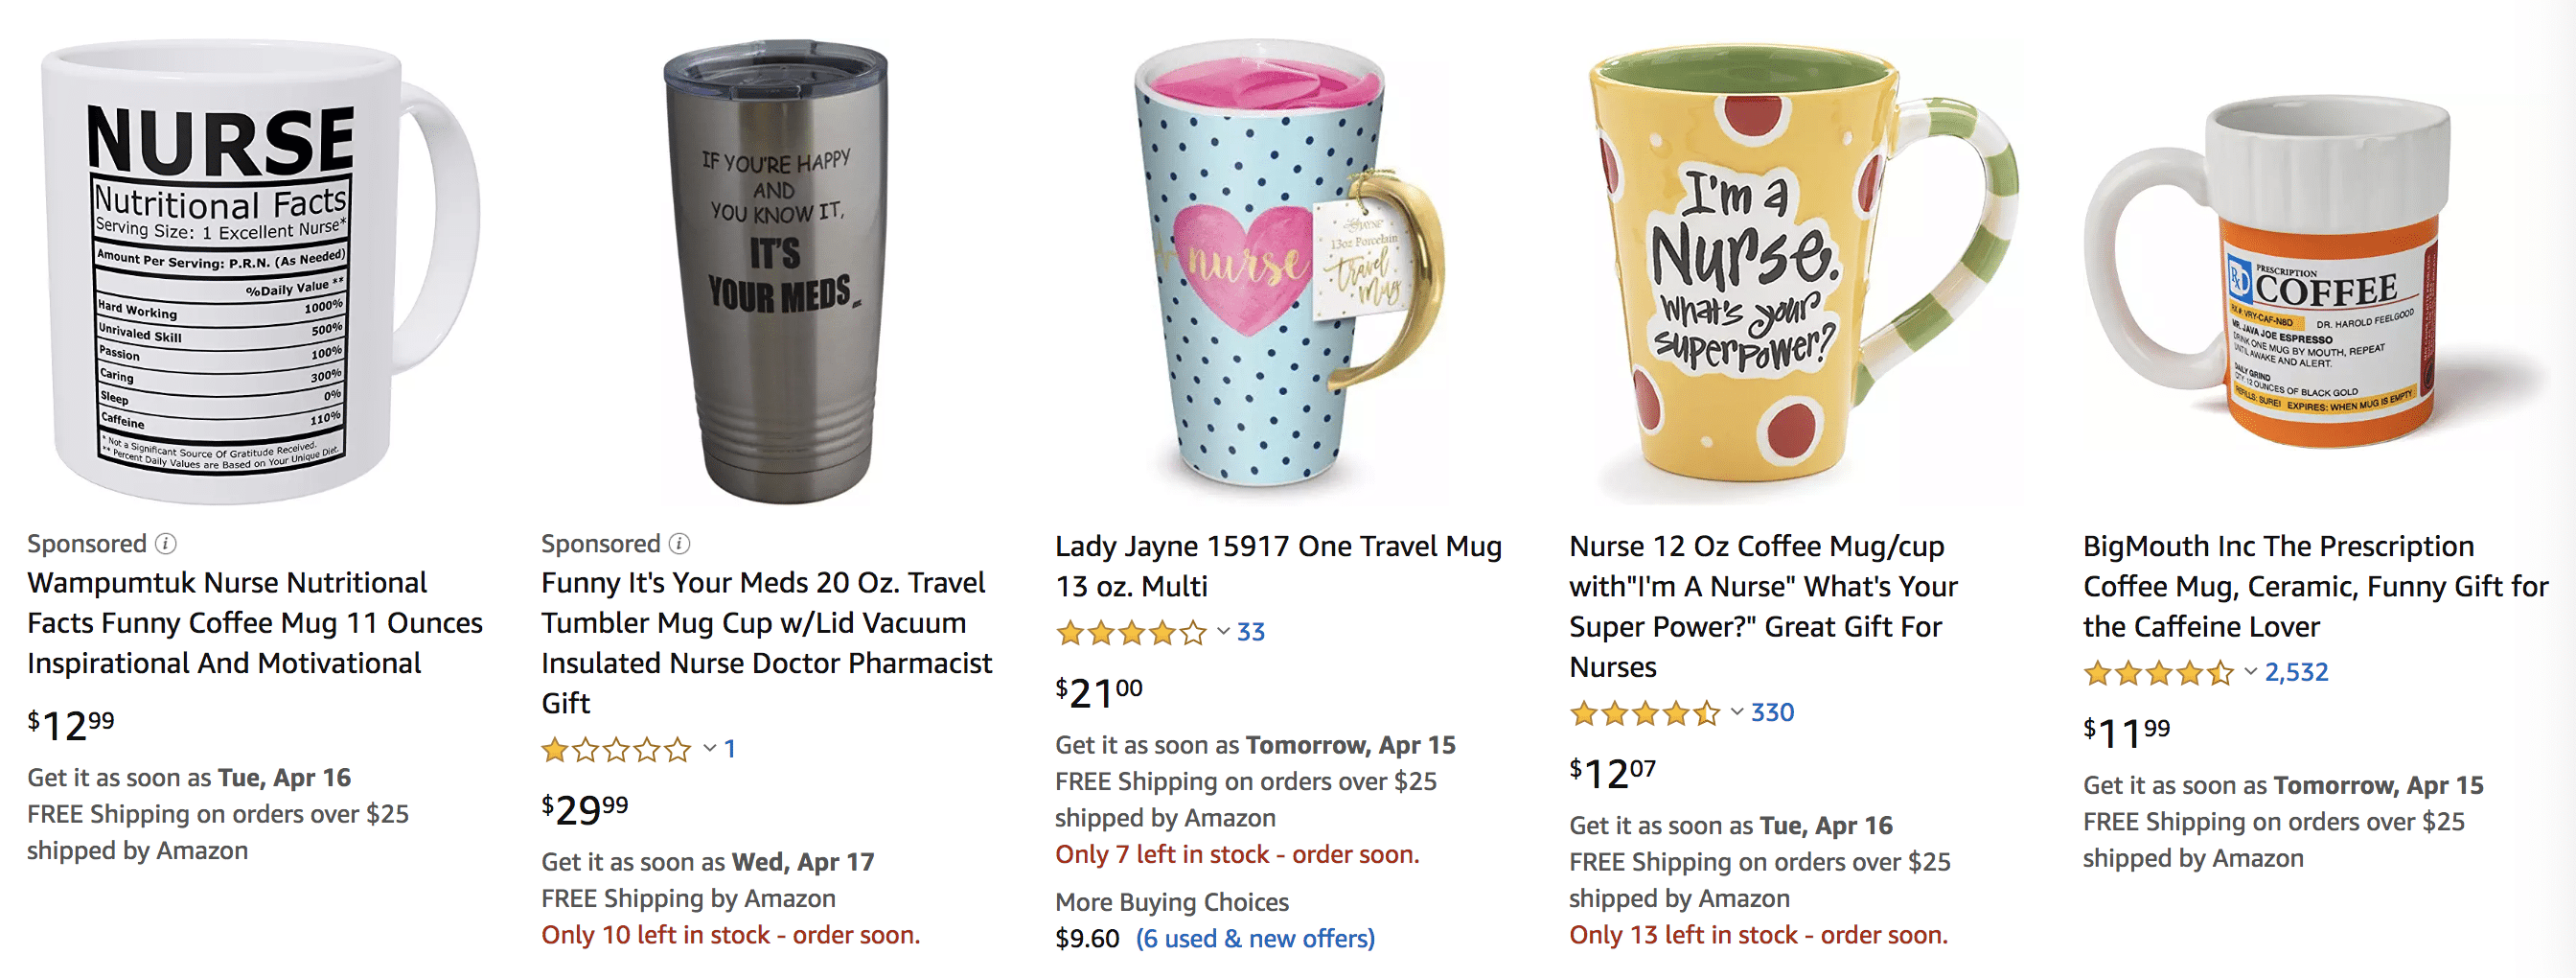
The above screenshot shows the search results I got when I used keyword “nurse mug” on April 15th.
You can see that the two products with sponsored ads can be delivered to the customer’s address before April 16th and 17th.
Or, for this one, I searched using the keyword “engineer mug”.
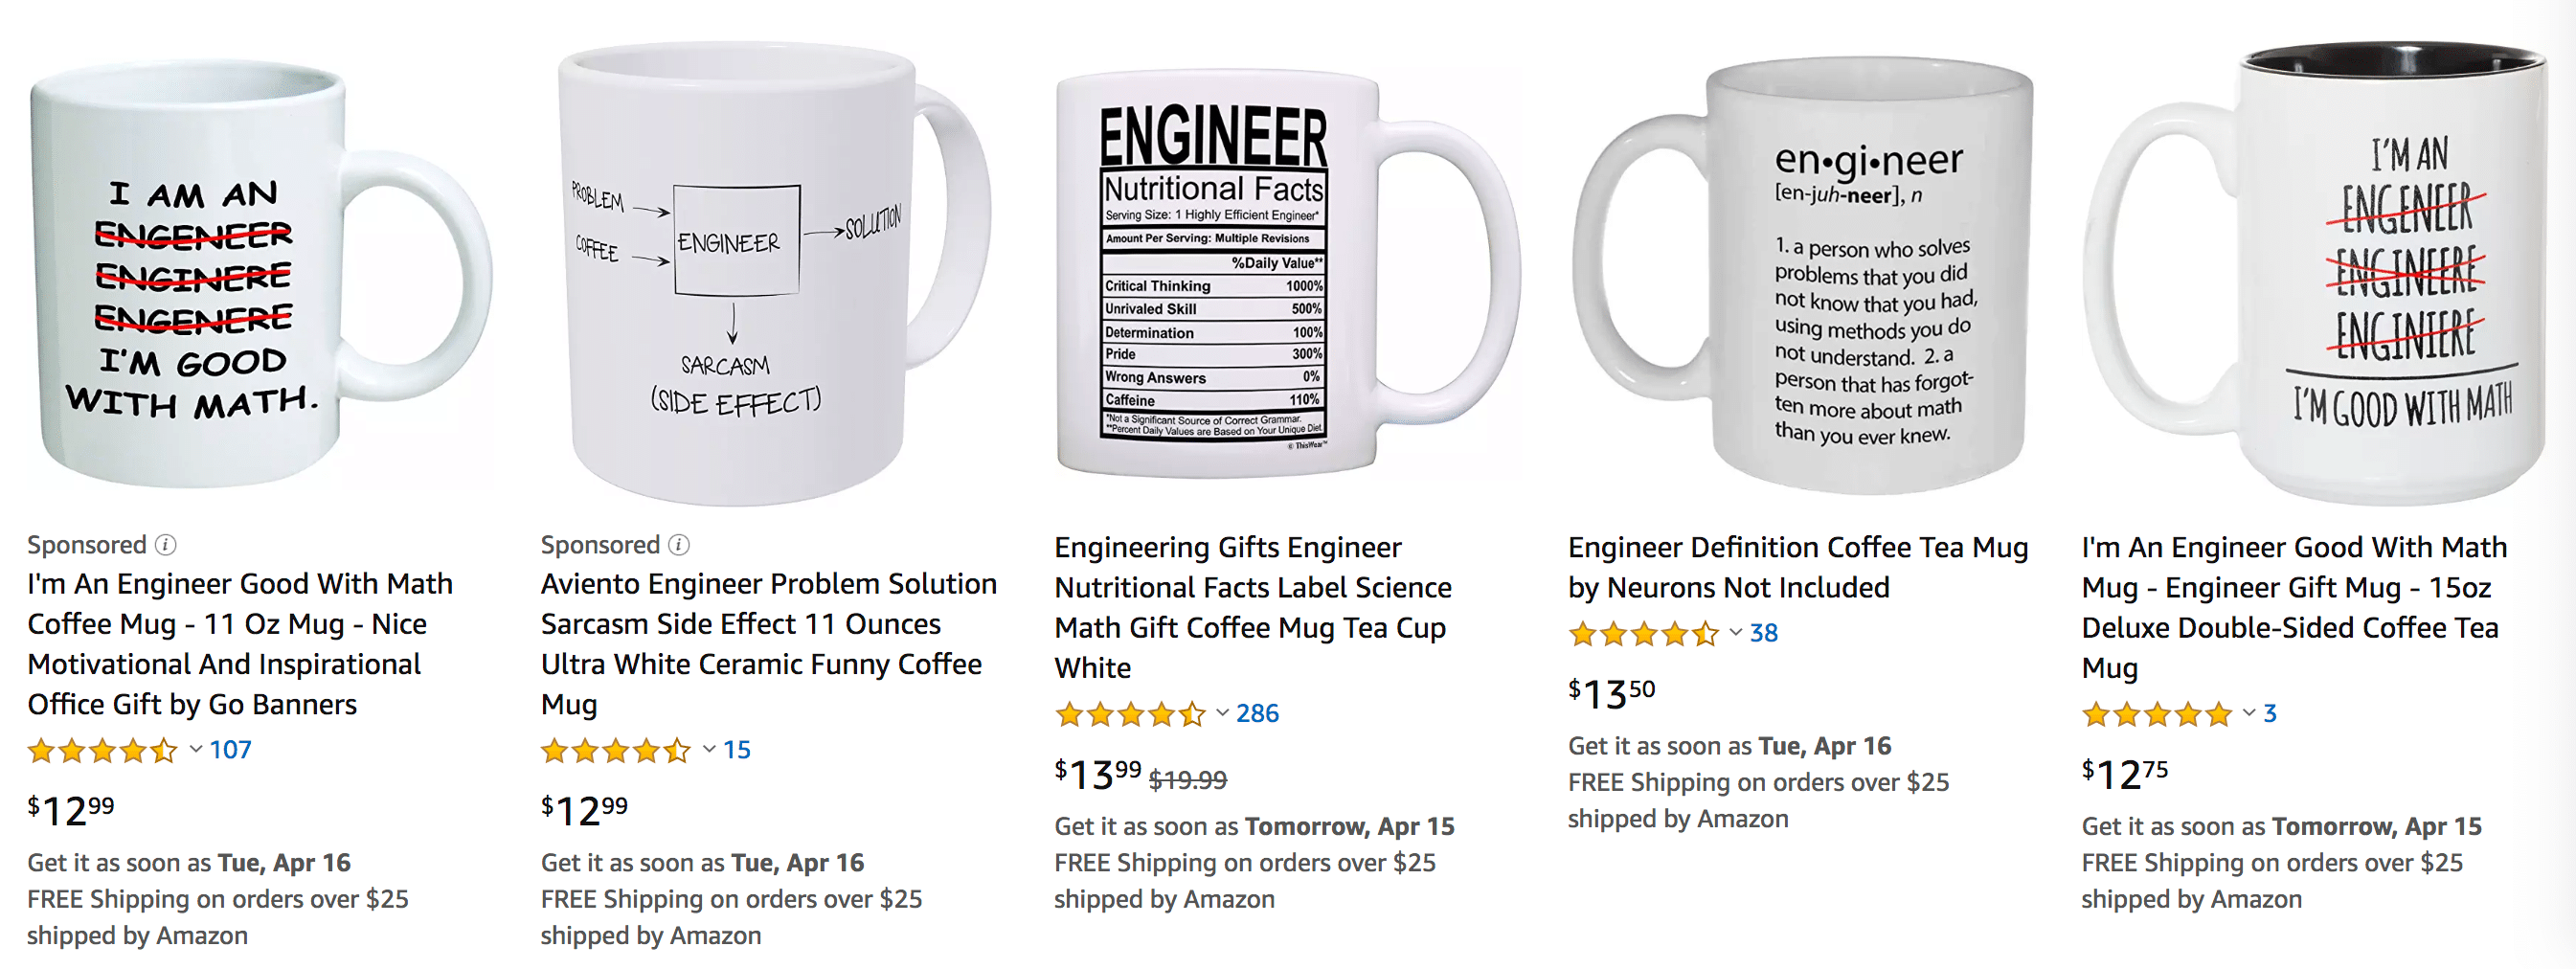
The two products with the sponsored ads can be delivered by April 16th, too.
They are all sitting at the Amazon warehouse, ready to be shipped fast by Amazon.
If you don’t send the product to Amazon’s warehouse, it will be difficult to sell with the ads.
Your product will be shown with a longer delivery time, along with other FBA products that can be shipped tomorrow.
Most people won’t select a product with a longer delivery time unless the product is way better than others with shorter delivery times.
People love getting a product fast.
So make sure you ship your selected products to Amazon before promoting them with ads.
This gives you the all-important “unfair advantage” I told you about in the previous lesson.
Set Up the Advertising Campaign
Okay, by now you should have some products to promote with Amazon Ads.
Now it’s time to set up your advertising campaign.
Basically, the overall process is to create campaign, set the daily budget and bid, set up the targets, and insert keywords (optional).
Let me walk you through this, step by step.
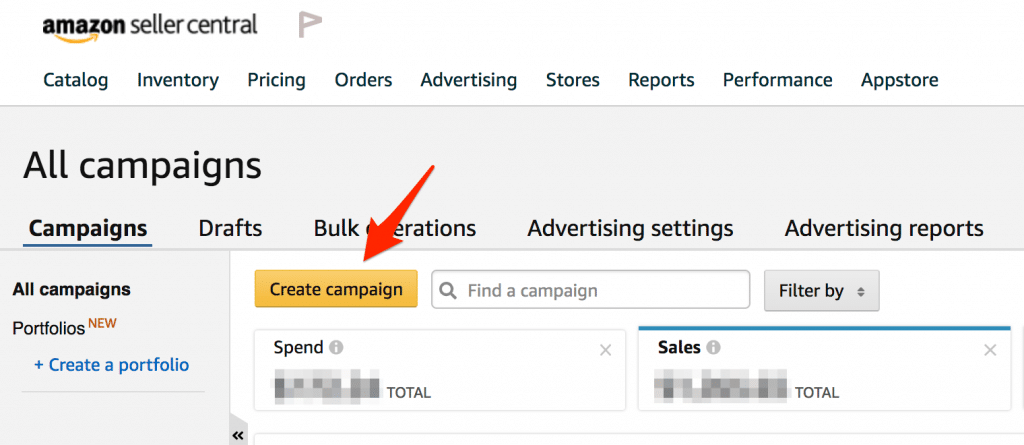
First, go to Campaign Manager by clicking “Advertising” and selecting “Campaign Manager”.

Click “Create campaign”.
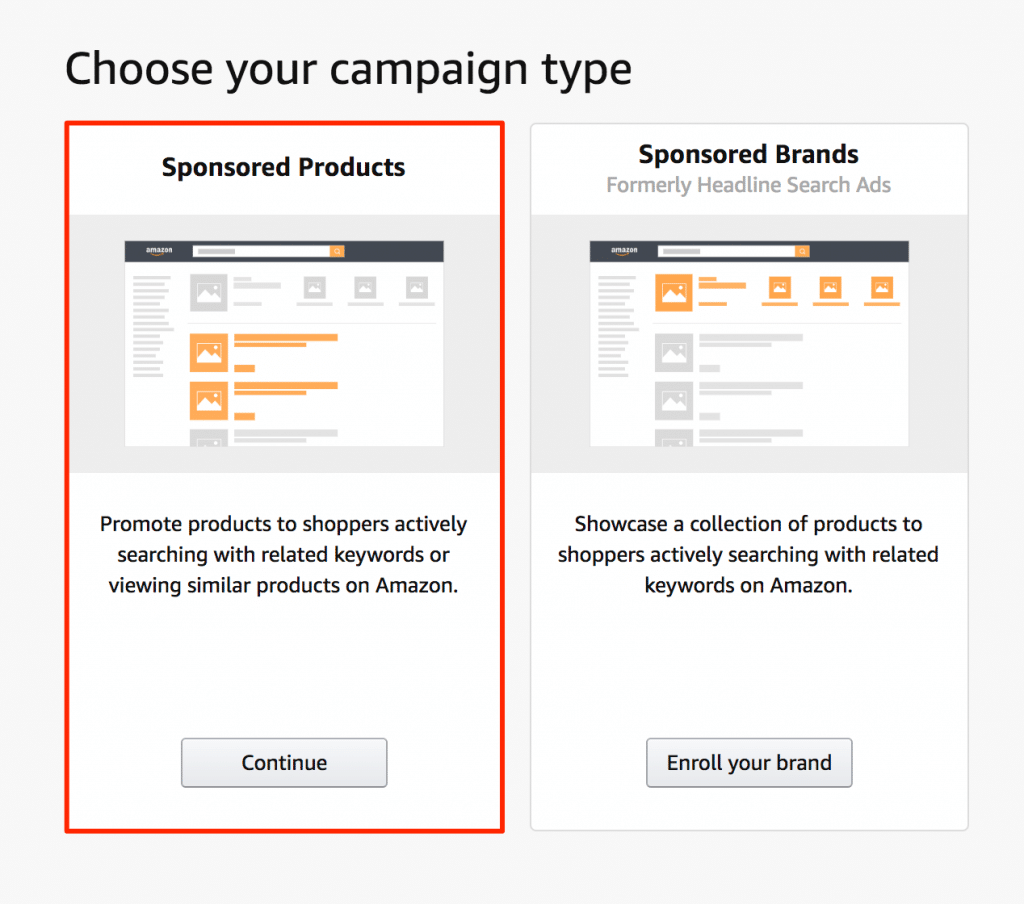
Then, choose the “Sponsored Products” option, because we will promote only the product we selected.
Next, enter the campaign name. I usually use my product name for the campaign name. It makes it easy to check the stats. We’ll create one campaign for one product.
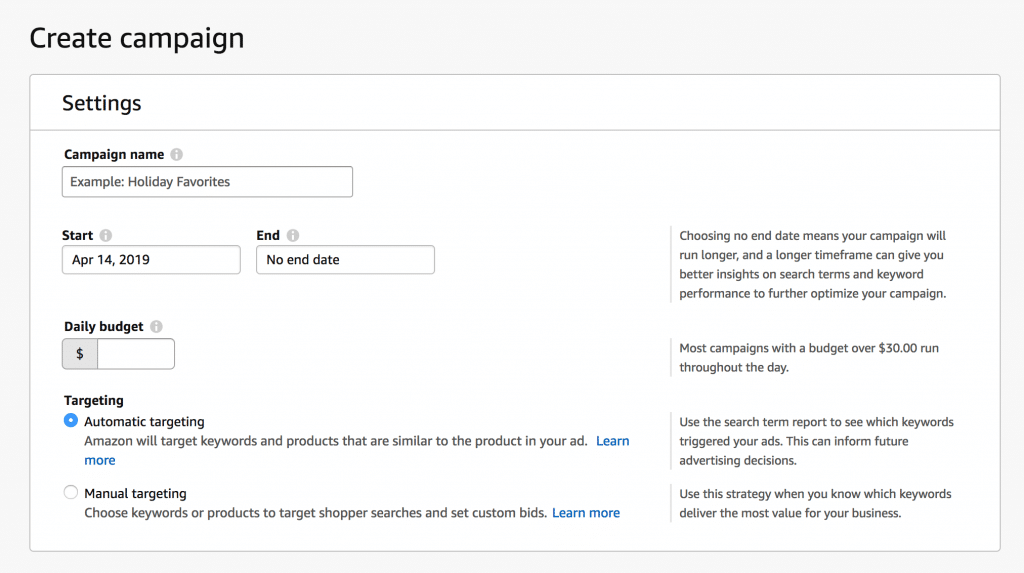
You can set up an end date when the special day has passed, but I rarely set an end date. I usually pause the campaign by myself.
Set the daily budget you want. I usually start with a $10 daily budget. If the campaign works, I’ll increase it later.
For targeting, Automatic targeting and Manual targeting work differently.
With Automatic targeting, Amazon will basically select keywords related to your product. With Manual targeting, you have to find and insert the keywords by yourself.
I usually create two campaigns for these two options.
There will be two campaigns like this in my account:
- Product A - Auto Targeting
- Product A - Manual Targeting
Both campaigns will promote the same product at the same time. But when I do my optimization, I will take different actions for these two campaigns.
You can go to the “Advertising Reports” menu to export stats for the search terms for all campaigns.
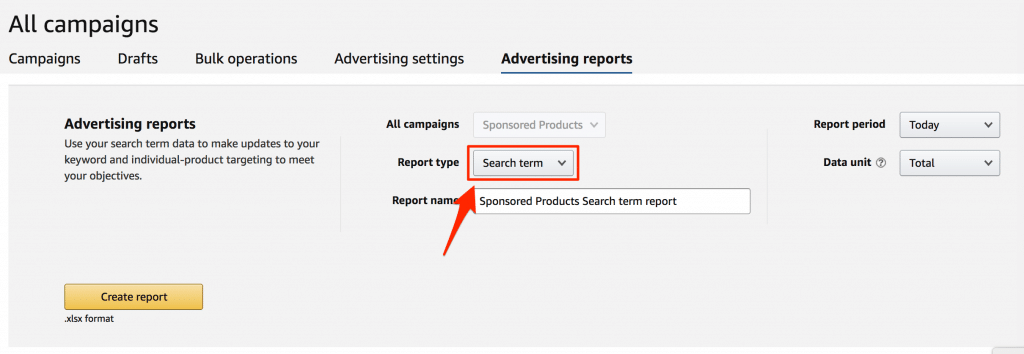
For the Auto targeting campaign, I’ll find the keywords that have a high cost per click and do not make any sales.
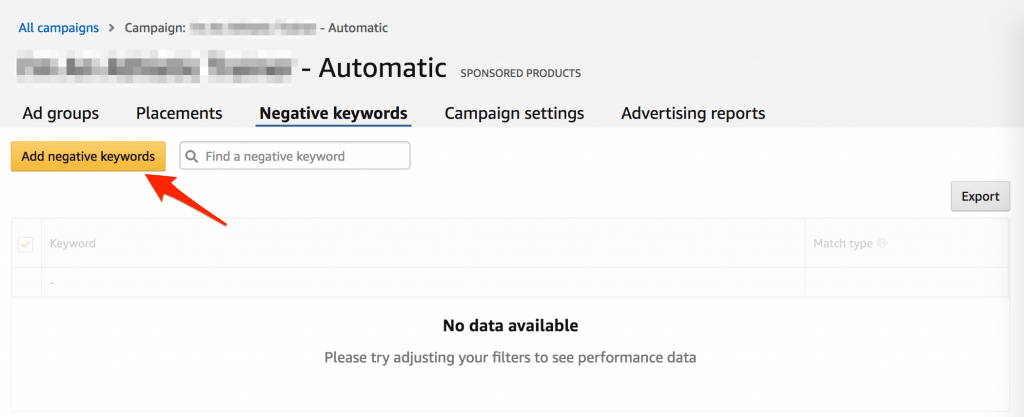
These non-performing keywords will be added to the Negative Keywords list.
For the Manual targeting campaign, I’ll add high-performing keywords from the “Auto Targeting Campaign” to this campaign, so I can control the bid price for each keyword.
I'll also add the non-performing keywords here to the negative keywords list.
After you’ve done this for a while, the Manual targeting campaign will have many good keywords, and you can adjust the bidding price for each keyword individually and be at the top of the product page.
Okay, let’s get back to the setup process.
Next, you have to select the product to promote. Just find your product here using the ASIN.
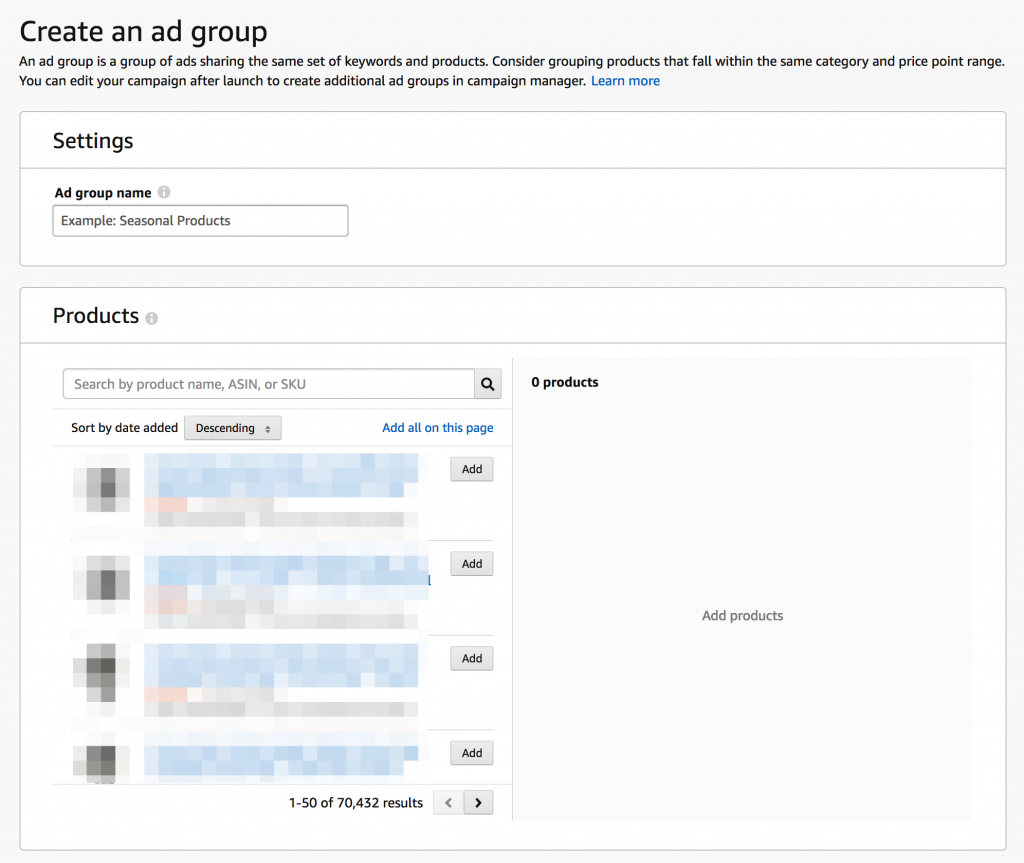
If you have multiple winning products in the same niche but different designs, you can add multiple products here, too.
Most of the time, I select just one product for one campaign.
The next part is about bidding.
There are three ways to adjust the bid: Dynamic bids (down only, Dynamic bids (up and down), and Fixed bids.
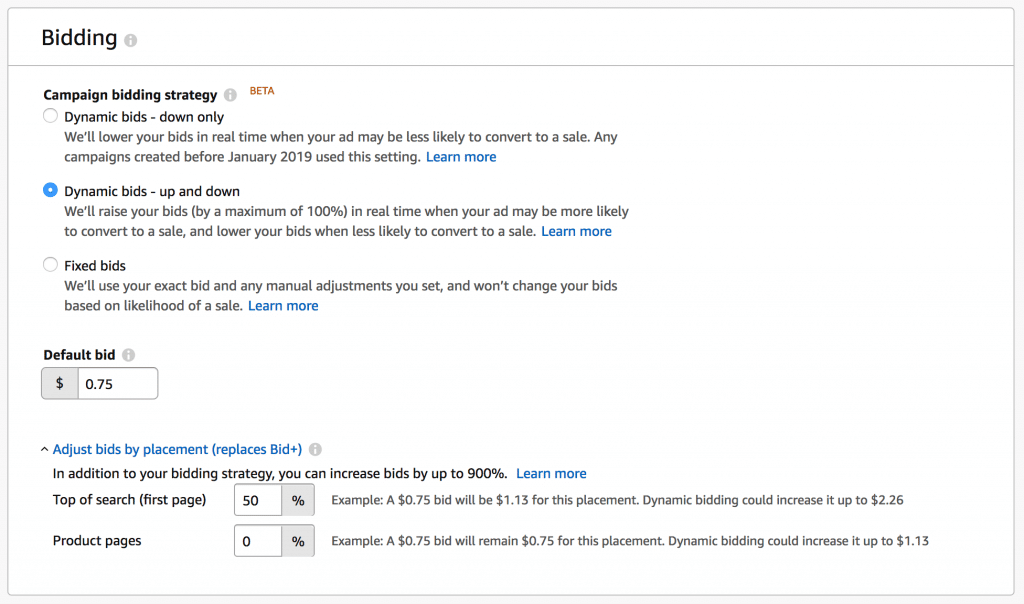
I usually select the second option or Dynamic bids (up and down), because I want Amazon to adjust the bid for me automatically.
The default bid I set is $0.75-1.
Also, you should adjust the bids by placement. Click “Adjust bids by placement (replaces Bid+)”.
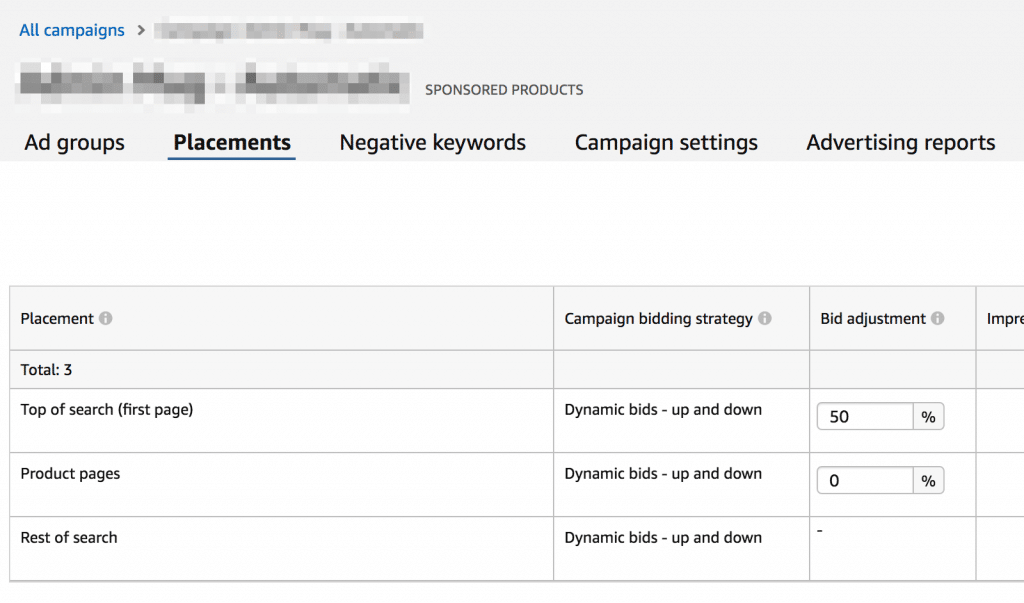
I always increase the bids by 50% for the top of the search (first page).
According to my stats, most sales come from the top of the search on the first page. I rarely have sales from the following product pages.
If you select the “Manual Targeting” option, you will see this keyword box:
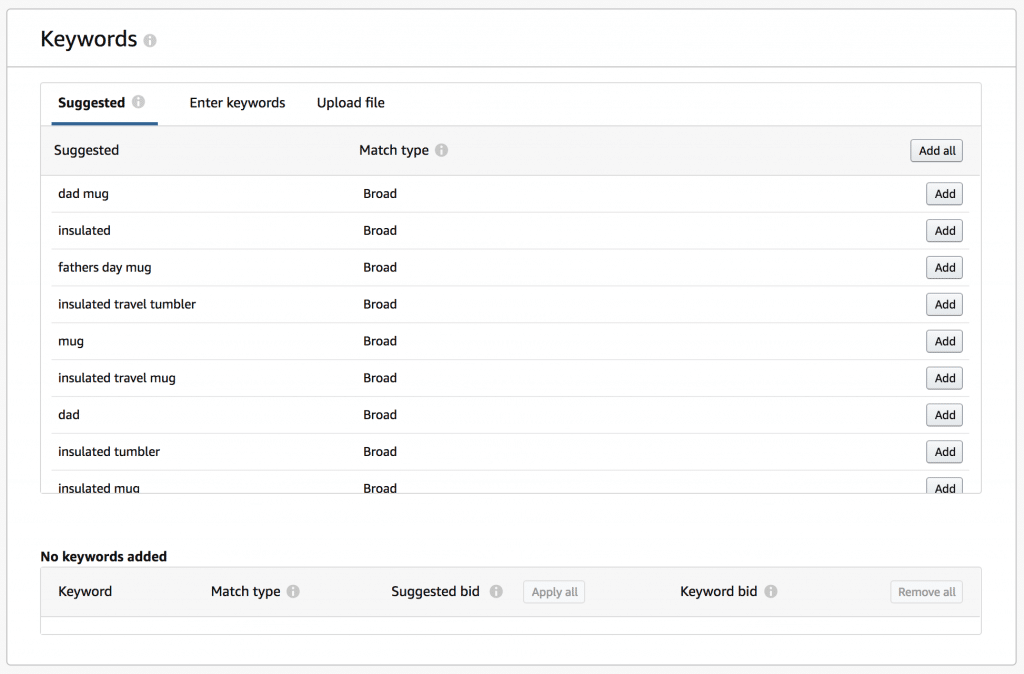
You can select some keywords from the suggested keywords from Amazon, but make sure they are relevant to your product.
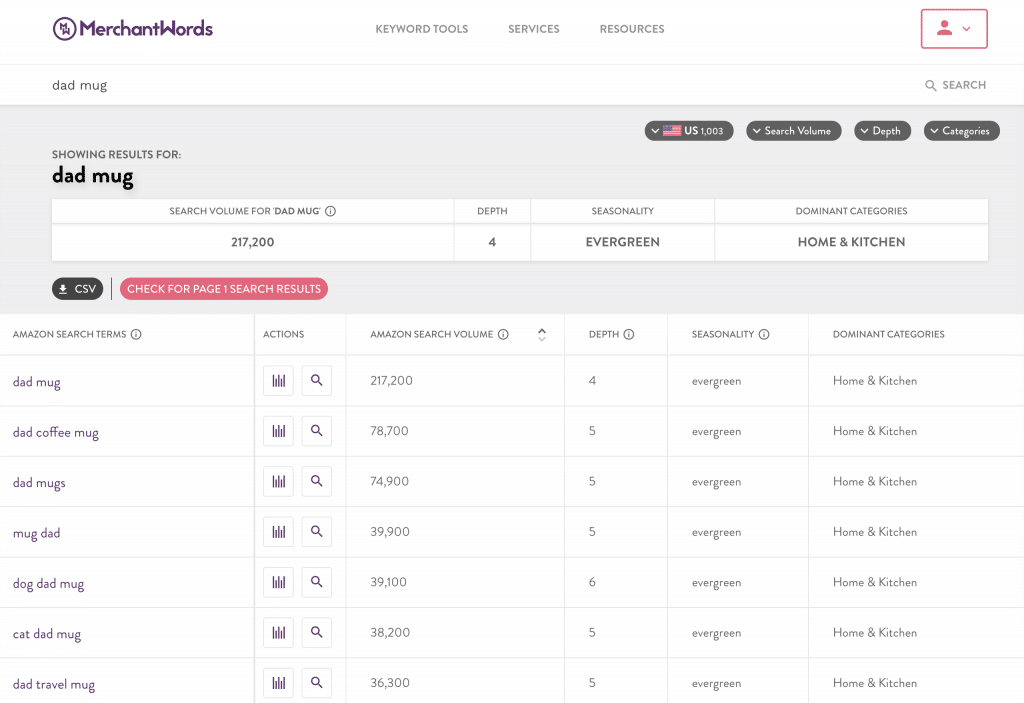
I usually insert keywords manually here. I use MerchantWords to find keywords related to my item.
Select keywords that are related to your product and have a high search volume, and add them here.
There are three kinds of matching type: Broad, Phrase, and Exact. They are each a bit different.

This is the explanation from Amazon:
- Broad - Contains all the keywords in any order and includes plurals, variations and related keywords.
- Phrase - Contains the exact phrase or sequence of keywords.
- Exact - Exactly matches the keyword or sequence of keywords.”
Let me explain this more simply. If you insert the keyword “Engineer Mug” in the ad campaign, you will get traffic when visitors search using keywords like this:
- Broad - “Mug for Engineer” (the keywords in any order)
- Phrase - “Engineer Mug for Men” or “Engineer White Mug for Men” (the keyword in sequence order)
- Exact - “Engineer Mug” (exactly match keyword)
I usually use Broad for the matching type, because I want more traffic from Amazon.
If I see that some keywords don’t work for my product, I’ll just add them to my negative keyword list.
You can add the Negative keywords later, after you have some stats.
Then click “Launch Campaign”.
Now you’re all set!
It will take a while before Amazon starts to send traffic to your products.
Optimization and Scaling
After your campaign runs for a while, you will have some stats. Note that Amazon has less traffic compared to Facebook and Google Ads. For some niches, you will get just a few clicks to your product’s page.
Many of my campaigns have very low traffic, even if I’ve set a high daily budget and a high bid amount.
But this isn’t a problem because for the 1-Hour System model, as we promote products in many niches. We will have lots of traffic from various niches, and very little competition.
If you haven’t got any traffic, here’s what you can do:
- Increase the bid amount.
- Add more general keywords.
I usually get more traffic from general keywords. For example, if I promote an Engineer mug, instead of targeting only the keyword “Engineer mug”, I’ll also target the keywords “Engineer Gifts”.
It might have a low conversion rate compared to more specific keywords like “Engineer mug”, but it will give you more traffic.
Anyway, a lower conversion rate but more net profit is cool, right? Net profit is what we want. Not ROI.
I’ll cut my losses by checking for low-performing keywords.
The metrics I will check are the Advertising Cost Of Sales (ACOS), and Cost Per Click (CPC).
The ACOS is the metric we can use to quickly check the overall performance of the campaign.
Basically, the lower, the better.
If the ACOS is low, it means your campaign can make sales with a very low ad spend.
You have to calculate the highest ACOS that can still make you some profit.
But we need to check the total cost of the product first. This includes the product cost, shipment cost and FBA fees.
For me, my product costs $4.95 per item, the shipment cost from my supplier to Amazon’s warehouse is around $0.2 per item, and the FBA fees are $8.05 per order.
So the total cost is around $13.2. I sell my product at $21.95 with free shipping. So I have $8.75 left.
I can’t spend more than $8.75 on ads. If I do, I won’t make any profit.
So my ACOS should be less than 39.8% (8.75/21.95 x 100).
If any keywords don’t make me any sales or have an ACOS greater than 39.8%, I’ll pause them or add them to the Negative keyword list.
That’s all about ACOS. I mainly look at this this to quickly check the overall performance of my campaign.
Another metric I always check is the Cost Per Click, or CPC.
Even I have spent few bucks – let’s say $2 – on any keyword and find that the CPC is higher than $1 and doesn’t result in any sales, I’ll pause them from my campaign.
We don’t need to wait for it to spend to $10. If the CPC is higher than $1, it’s difficult to make a profit.
That’s how I cut the losses from my campaigns.
The scaling method is not too difficult.
We can scale it simply by increasing the daily budget and the bid amount.
It’s much easier than scaling with Facebook Ads.
With Facebook ads, when we increase the daily budget, the overall cost will dramatically increase.
But in Amazon, it’s not that way. Amazon will try to spend our money slowly. If there is no traffic, they won’t try to find junk traffic for us.
We can increase our daily budget anytime we want. It will not be broken.
You can also do this if you run two campaigns, Automatic and Manual targeting, like I said before.
You can also scale by moving some good keywords from the Automatic targeting campaign to the Manual targeting campaign.
This way, you can adjust the bid amount for each keyword individually, which you can’t do in the Automatic targeting campaign.
If any keywords produce many sales with a low ACOS, just increase the bid amount to the highest. It will help you make more sales from that keyword.
Okay, that’s about it for my Amazon Ads strategy.
Let me recap:
First, you need a proven selling product (just 2-3 sales a month is enough) and have to send it to the Amazon warehouse to get the unfair FBA advantage.
Then, you create ads to boost sales.
I usually create two campaigns for one product (the Automatic and Manual targeting campaigns).
The Automatic targeting campaign will select keywords related to your product automatically. With the Manual targeting campaign, you have to find the keywords by yourself.
After your campaign runs for a while, you need to check the stats and optimize your campaign.
The metrics I usually check are the ACOS and CPC.
Calculate the highest ACOS that can still make you some profit. If any keywords don’t make any sales or have an ACOS higher than what you calculate, just pause them or move them to your Negative keywords list.
The CPC should be less than $1. It can be higher if it makes you some sales (that would be a very high conversion rate!).
You can scale your ads campaign by increasing the daily budget, bid amount, and adding more related keywords (in the Manual targeting campaign).
That’s it for my Amazon ads strategy. If you have any questions, feel free to let me know. :)
