The Jewelry Message Card is another top-selling print-on-demand product you can make lots of money from.
If you have no idea what jewelry message cards look like, here are some examples:

Basically, a jewelry message card is a pendant necklace with a message card behind it. People like to buy them as special-occasion gifts.
They also allow the buyer to pass on a special message to people they love.
The cost of production cost of a jewelry message is generally higher than those for products such as coffee mugs or t-shirts, but you can price it a lot higher and earn bigger margins.
For example, the cost of a sunflower pendant message card from Gearbubble is around $20, including shipping.
You can sell it for between $49.95 and 89.95 and make from $29.95 to $69.95 in profit.
The cost of a coffee mug is around $10 (including shipping) and you can sell it for between $16.95 and $24.95. Your profit can be around $7-15.
You can see that the profit margins differ greatly between these two products.
In this article, I’ll show you how to sell jewelry message cards the alternative way.
I say “alternative” because I’m pretty sure I don’t do it the same way as other sellers.
The alternative way I’m going to share is 98% hands-off. That means you don’t have to spend much time on it.
I admit that I wasn’t always successful at selling this kind of product. I couldn’t tell which messages were good or which designs were beautiful.
I usually make sales by selling funny coffee mugs with profane language. The designs on the coffee mugs are just plain black text on a transparent background.
Coffee mugs and jewelry message cards are VERY different products.
So, selling necklaces bearing lovely messages is a lot different from what I did in the past.
I bought many courses from people who’d had success selling with jewelry message cards and spent lots of money on Facebook Ads.
But I couldn’t make it work. My stuff just didn’t sell.
It took me many months and a lot of money to learn how to sell this kind of product* “in my own style”*.
I think you can do the same.
Let’s find out how.
P.S. Please note that this article will skip the basic steps like how to get an Amazon account and how to create print-on-demand products.
If you’re new to this, I recommend that you read my ultimate guide to selling print-on-demand products first.
Find Two People on OnlineJobs.ph
Okay, the first step is to find two people for your team.
Ah…my own style…I won’t be involved in the process.
These two people will handle 98% of the work for you.
The first one is the graphic designer. This person will create designs for the message cards for you.
The other person is the virtual assistant (or VA). This person will help you find quotes for the products and upload products for you.
I highly recommend that you find these two people on OnlineJobs.ph
Why? Because you can hire them to do this kind of work at a very affordable price. They are Filipinos and very easy to work with.
The cost of living in the Philippines is not that expensive compared to the United States or Europe, so you can hire them at a much cheaper price.
I have a guide on how to find people for your print-on-demand business. All the info you need is in the article I just mentioned.
Let the Graphic Designer Create 300 Templates for Message Cards
Now that you have two people on your team, let’s give your graphic designer something to do.
Ask him or her to create 300 templates for your message cards.
Like this:

There are two places in the card where you need to insert words:
- To [RECEIVER]
- Quote
So, when I hired a graphic designer to create templates, I sent him this image:

I told him to create 100 main templates. I asked him to add design elements to the black part and leave space in the white part for the messages.
So: create these 100 main templates with black as the background color.
Then, change the backgrounds to dark blue and white.
So, you’ll have 300 templates to use - black, blue, and white.
That’s it.
You might be curious…Why use templates?
Basically, if you hire a graphic designer to create a unique message card design, they’ll charge you around $10-40 per piece, depending on the quality and how well you negotiate with the designer.
100 Designs = $1,000-4,000.
That’s a lot of money.
When I started selling jewelry message cards, I paid $25 to a designer on Fiverr to create one design for me.
It had a nice background, some unique design elements, and text.
I paid over $5,000 in total for the designs – and later found out that it wasn’t necessary.
The truth is, customers don’t want all-new designs like that.
The jewelry message card is like other print-on-demand products. People buy it because of the message on the product.
They’ll see what product it is first (sunflower pendant, cross pendant, etc.), the message, and the design.
The design is usually the last thing people will consider.
If the design is beautiful but the message doesn’t say what the buyer wants to tell the receiver, they won’t buy it.
So, an average design is enough to make sales.
Using these templates, you can hire a graphic designer from OnlineJobs.php to create one design for you for just $0.5.
It’s cheap because the designer just has to add text to the template.
Just insert some text, like “To My Daughter”, and the message. It takes 5 minutes to create one design, so there will be many designers willing to do the work for you at this price or even less.
So, you can use the templates to create tons of designs.
And it’s a lot cheaper than hiring a designer to create one unique design for you.
Teach your virtual assistant to use PODTurbo
When I hired a virtual assistant to upload products for me manually, I paid her $150 to upload 750 products for me every week.
It cost $600 a month to upload 3,000 products to my Amazon account only.
If you want to save costs on product uploading, use PODTurbo. It costs just $97 per month.
Teach your virtual assistant how to use it.
With PODTurbo, your virtual assistant can reduce the time they need to upload products from 10 hours to just 1-2 hours.
That means you can pay the virtual assistant for just 2 hours and save a lot of money.
Here’s what you have to do to let your VA use PODTurbo.
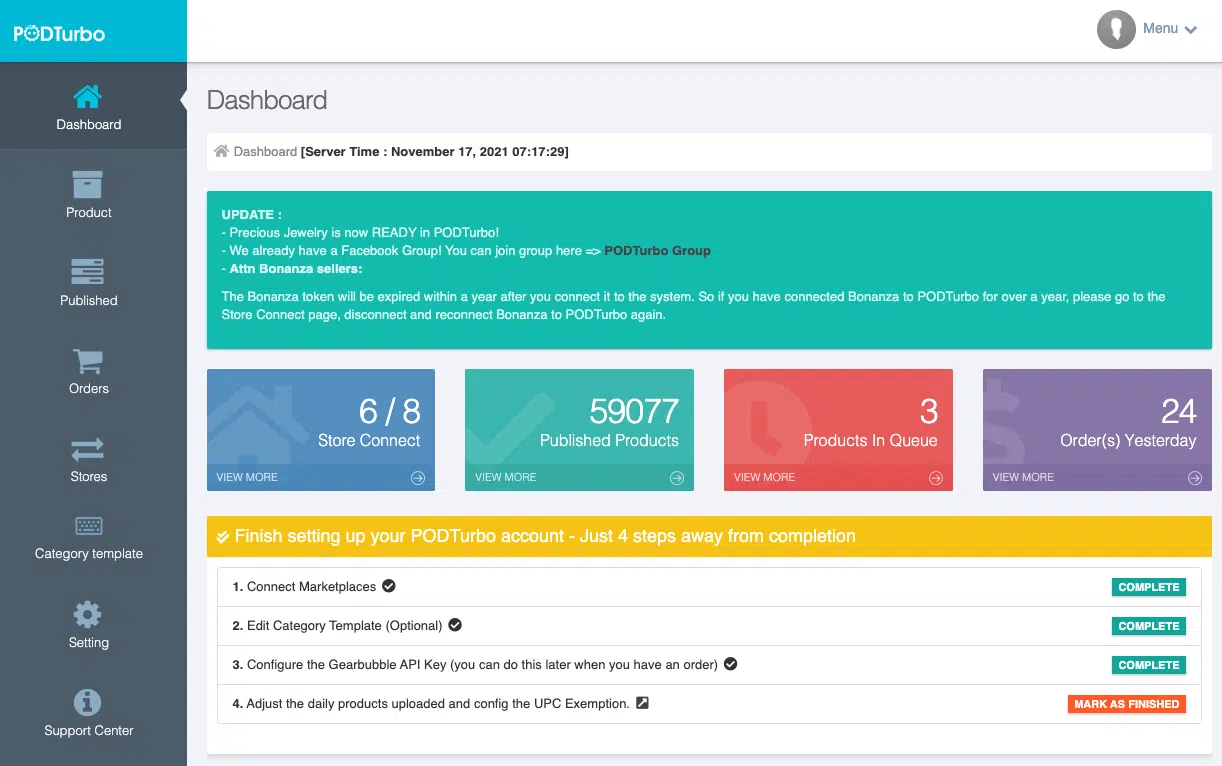
1. Set up PODTurbo
When you get PODTurbo, you just have to connect the marketplaces (such as Amazon or Etsy) that you want to use with the system.
Test the connection to ensure the system can upload a product to your store correctly.
Then, update the product description template in the system. Make it unique, so your products will get better SEO scores in the search engines.
Finally, set up the maximum number of products you want to upload per day. I usually upload 150 products to Amazon and 50 products to Etsy every day.
2. Prepare the Excel Product Template for your Virtual Assistant
If you want your virtual assistant to think about the product titles or keywords for you, it’s difficult to teach him or her to do it the way you want.
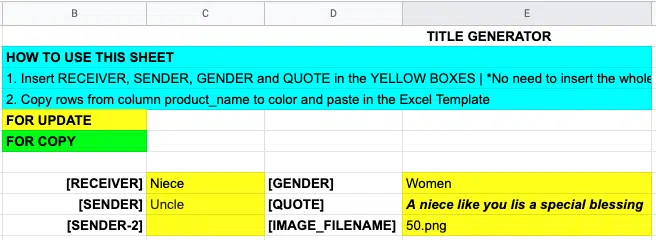
I create a template that my team can use. It looks like this:
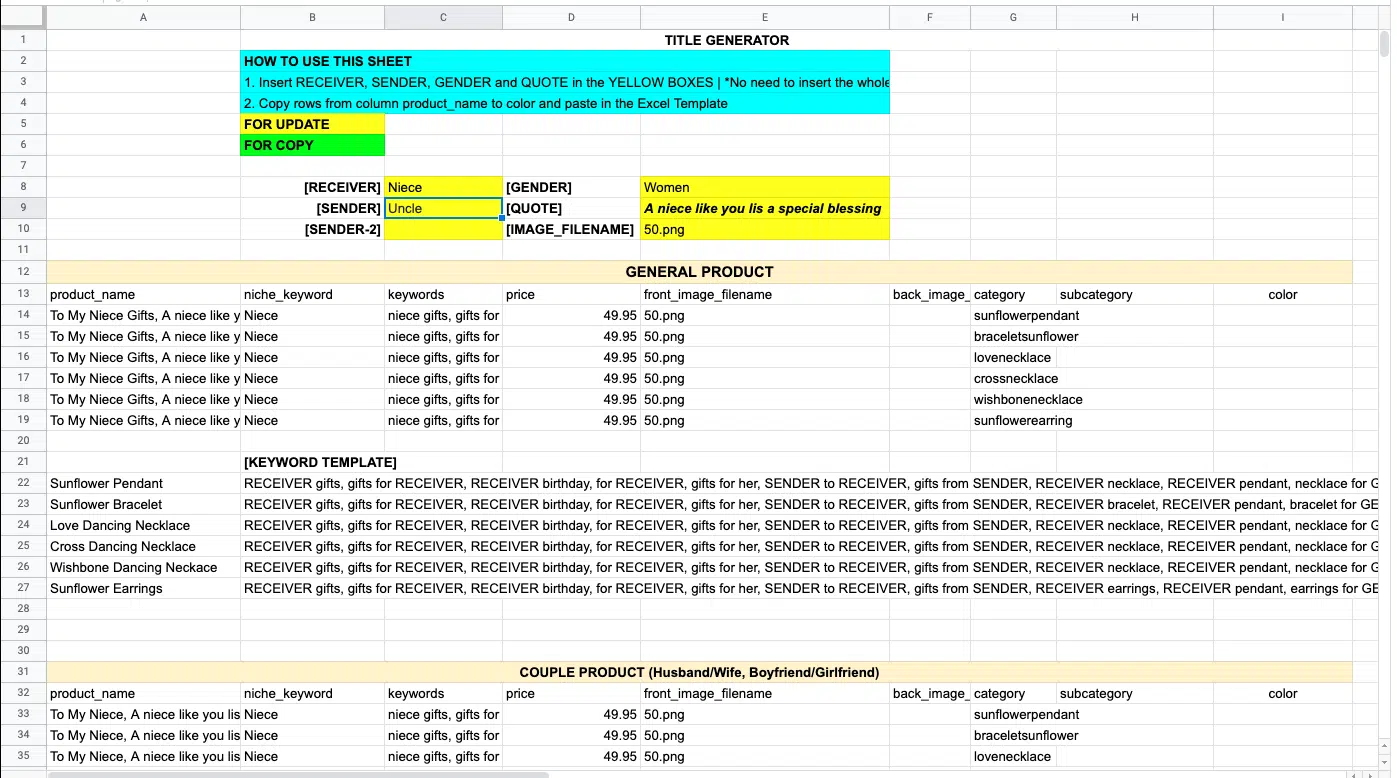
I spent a few hours creating this Excel sheet so can do their work more easily.
In this sheet, I just inserted some basic formulas to connect the words.
My virtual assistant just needs to insert the Receiver, Sender, Quote, Gender, and Image Filename in the fields I created.
Excel will then create the product titles and keywords automatically. My VA just copies and pastes the product info into the .CSV file that will be uploaded to PODTurbo.
Like this:
Next, the virtual assistant exports the .CSV file and uploads it to PODTurbo.
It usually takes just 1-2 hours to prepare 200-300 products for uploading.
I know it’s a bit tricky to create these Excel templates. But I strongly urge you to do it. Learn how to create your own template!
Let me borrow a quote from Abraham Lincoln:
“If I had eight hours to chop down a tree, I’d spend the first six of them sharpening my axe.”
Abraham Lincoln
It’s the same concept in POD. You have to prepare templates for your team so they can work faster.
You’ll also get the product titles and keywords you like and save tons on hiring costs.
Weekly Working Routine
Okay, I’ve explained the two hardest parts.
Let’s sum up the working routine that you and your team must complete each week.
1. Select niches for your jewelry message cards
This is your main job. You choose the niches and let your team do the rest of the work.
It takes just a few minutes. I usually choose 5 niches per week and pass them on to my virtual assistant.
I let my team do 1 niche per day. They work 5 days a week for me.
2. Let your virtual assistant find the quotes
Next, pass the niches you chose in the previous step to your virtual assistant so they can find niche-appropriate quotes.
I let my virtual assistant find 5 quotes per niche. It takes them just a few minutes to do this work.
Speaking of quotes …
When I first started selling jewelry message cards, I thought that people liked to buy jewelry with a lovely message and a beautifully designed card.
I spent lots of money on hiring people to come up with the nice messages and cool designers to create message cards with lovely designs.
But none of them was a big winner.
Maybe I’m not a native English speaker, so I don’t get the messages. I wasn’t sure if the messages I had were good or not.
They’re not like the messages on coffee mugs, which are funny (and most of the time sarcastic). I have a sense of which ones will work.
For the message cards, I just hired people to write nice sayings for me and launched them through ads.
I failed miserably!
I came back to what I’m familiar with.
I put **funny quotes on the message cards. **Many of them used vulgar language.
The funny thing is, they sold – and very well!
I think it was because not many people are doing it. Most message cards on Amazon or Etsy have lovely and polite messages.
Mine don’t. So, a specific group of people enjoys my funny products.
That’s another myth I discovered when I started selling jewelry message cards.
I could play my own game and just create products with funny messages. :D
So, I sent my funny quotes to my virtual assistant and asked her to find more quotes like these.
Then I let the virtual assistant pass these quotes to the graphic designer.
3. Let your graphic designer create designs
The graphic designer will create 1 design for 1 quote. My graphic designer creates 5 per day.
Let the designer use the templates you created earlier to create designs. The designer just has to figure out what font style to use and insert the text in the template.
It takes 30 minutes for him to create these 5 designs.
This is why you can hire a designer at a very cheap price.
After that, the graphic designer will pass the designs back to the virtual assistant.
4. Let your virtual assistant upload products to PODTurbo
For me, one design is used to create 6 types of jewelry message cards.
I use Gearbubble as a supplier. They have 6 kinds of jewelry message cards:
- Sunflower Pendant Necklace
- Sunflower Bracelet
- Love Dancing Necklace
- Cross Dancing Necklace
- Wishbone Dancing Necklace
- Sunflower Earrings
Let the product uploader put all the info into the Excel sheet you prepared and upload it with the designs to PODTurbo.
That’s it.
PODTurbo will automatically set times to upload products to your connected marketplaces. You don’t have to do anything after this.
First Month Results
So far, my team has uploaded 1,800 jewelry message cards to Amazon and Etsy in the past 1 month.
I’ve made around 27 sales so far. I charged my customers $59.95 for each message card including shipping.
My total revenue has been around $1,618.65.
These are my expenses so far:
- $100 - 300 Design Templates
- $200 - Hiring a Virtual Assistant
- $60 - Hiring a Designer
- $360 - Etsy Listing Fees
- $540 - Production Costs
Total Expenses: $1,080
Estimated Profit = $538.65.
I spent around 1-2 hours creating the Excel template and another hour setting up the production flow.
After that, I spent around 15 minutes a week assigning work to my team.
My monthly revenue is totally worth the time I invested.
Okay, this is the entire production flow I created to build my Precious Jewelry business.
You can see it’s very simple and doesn’t require much time to implement.
It might be a bit difficult to create the Excel Template, but it’s not that hard. If you know how to connect words across cells in Excel, you can build your own template easily.
That’s it for this blog post.
Let’s get back to work!
—Bank K.
![]()
